Legion 42 Death Trooper Build Reference Guide
At L42 our primary goal is to help other Death Troopers build there ideal Star Wars fan based costume that will meet or exceed the 501st Legion requirements to officially troop with local garrisons and thrill the hell out of every Star Wars fan they meet and put a Imperial boot on the throats who don't. This is not a definitive site, but we hope to help and add more content as time permits and requests come in. So, if you don't see something you need info on or need more clarification about please reach out to us through any of the JR1942, Hangar42, or L42 request forms.
Death Trooper Belt

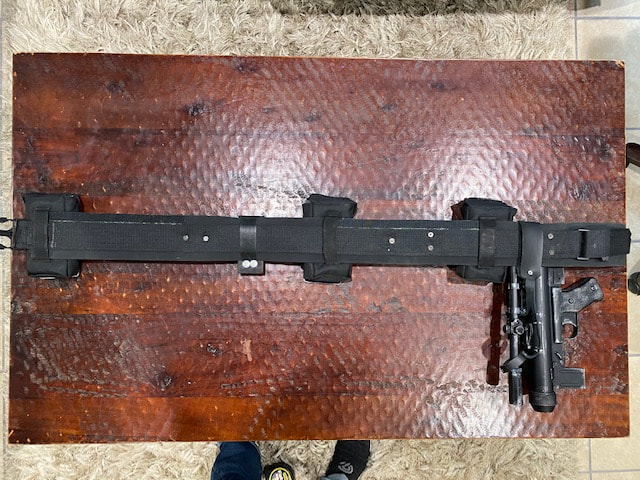
Overall reference image layout. Notice how I off-set the belt buckle to the left, and that it is not centered on the belt. I'll tell you why later on...
|

I noticed from most builds that the left and right pouches are about 2" left and right from edge of buckle. This may vary based on your size.
|
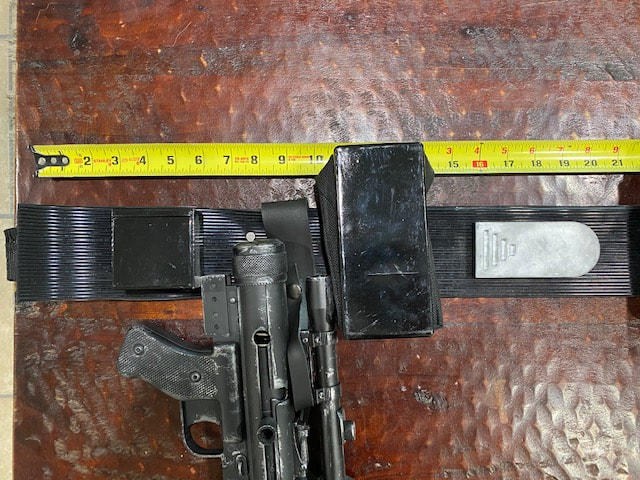
I'm 6" w/35" waist. The Belt buckle is centered at approximately 18" from left edge of the corrugated rubber belt that you will receive.
|
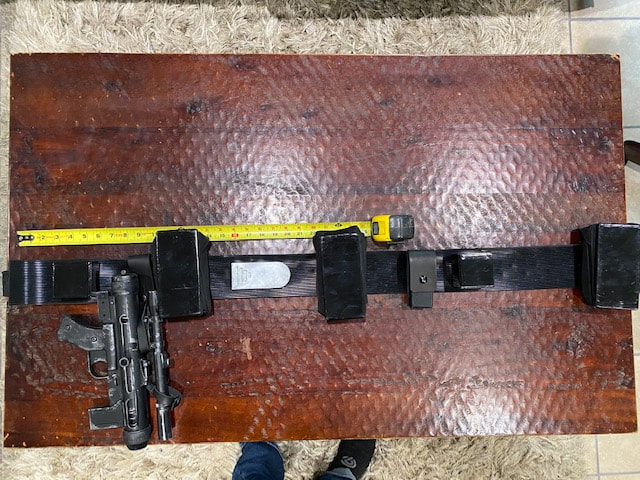
Ammo pouches are centered at 12" and 24", and held in place with velcro on opposite side to the inside pouch strap and nylon webbing.
|
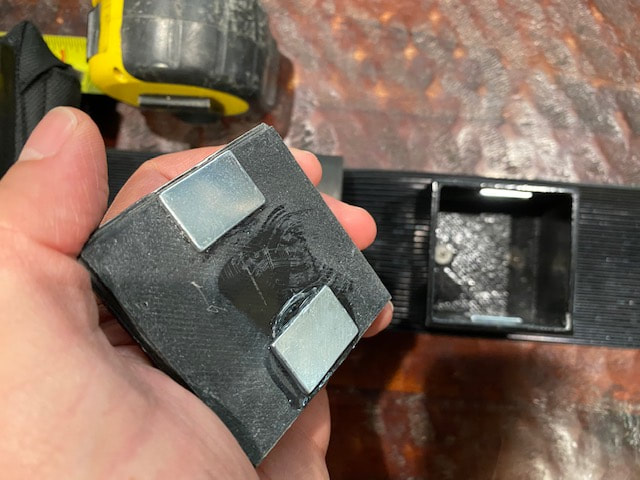
I used rare earth magnets in order to open and close these hard plastic boxes. I used E-6000 to keep them in place. Test polarity before gluing.
|

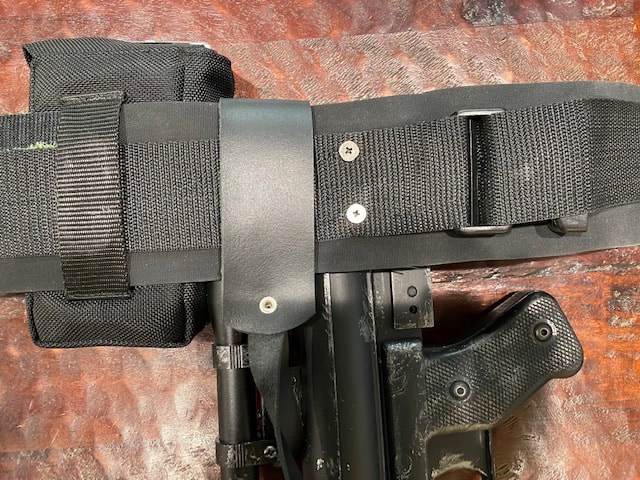
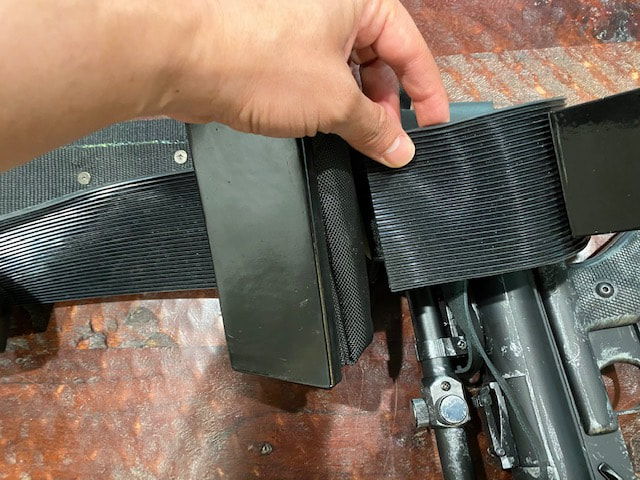
In order to secure the x2 plastic cases I used Chicago screws that went through both rubber / nylon belt on the opposite side.
|
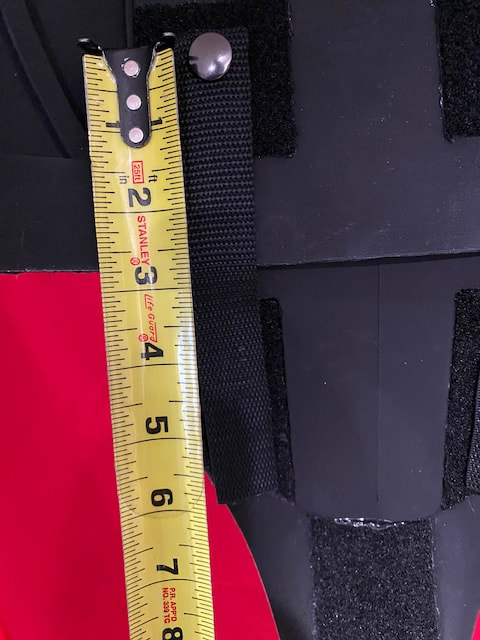
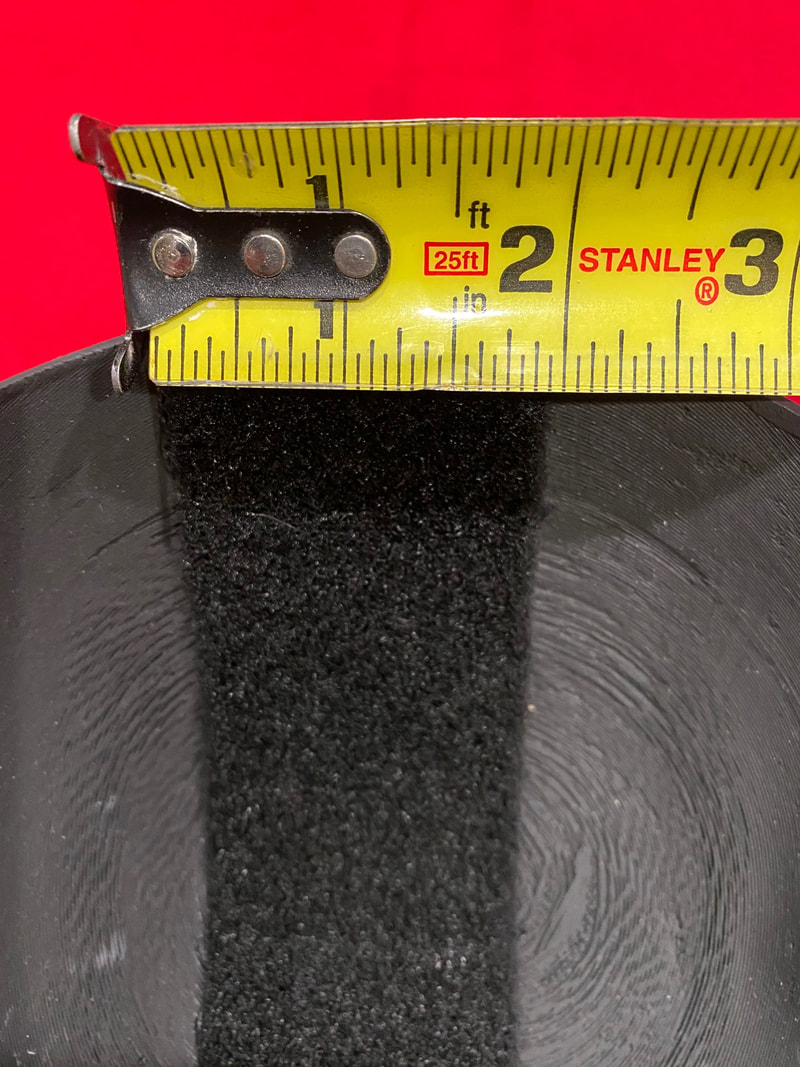
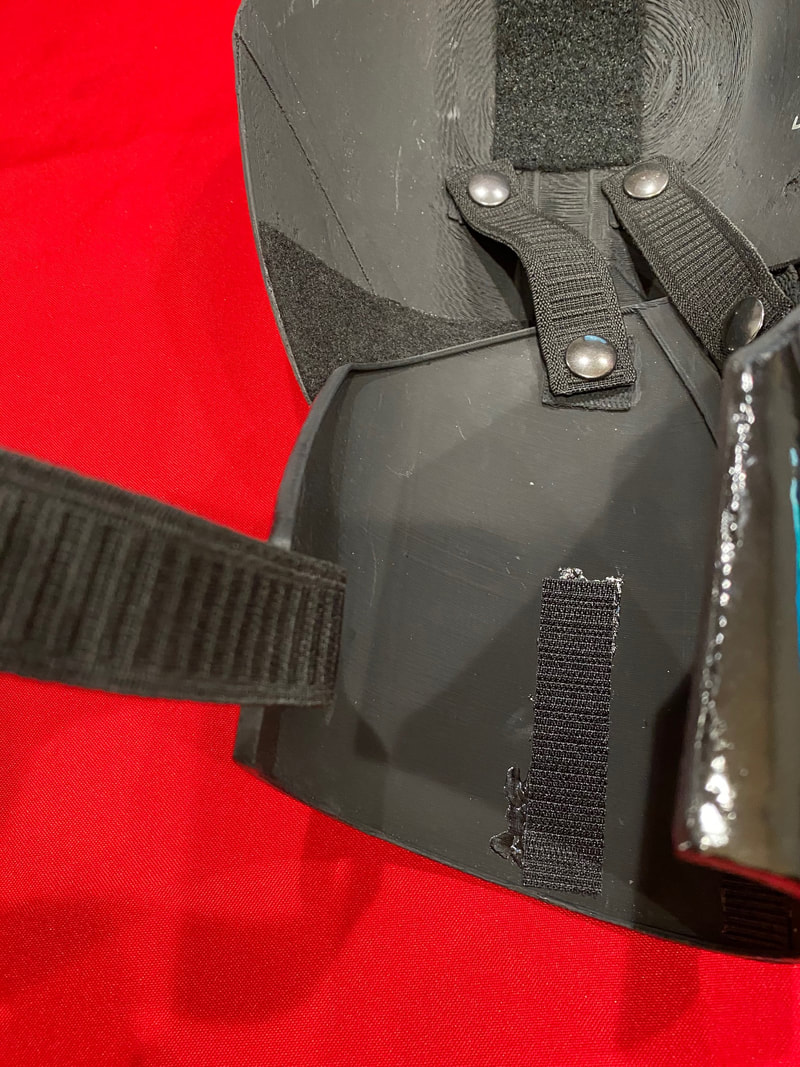
Inside of the belt. Hard to see, but there are x2 pieces of .5" strips of Velcro above the webbing holding belt secure in front / back of armor.
|

Purchased 2" adjustable buckle from Amazon, 2" nylon webbing from Home Depot. Glued webbing to rubber belt w/E-6000 to reinforce it.
|
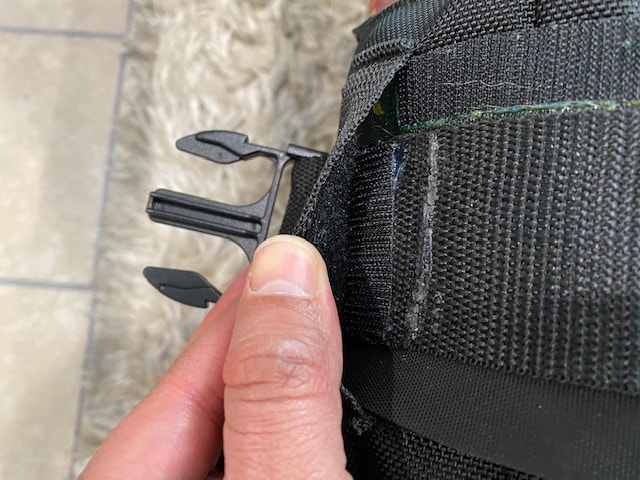
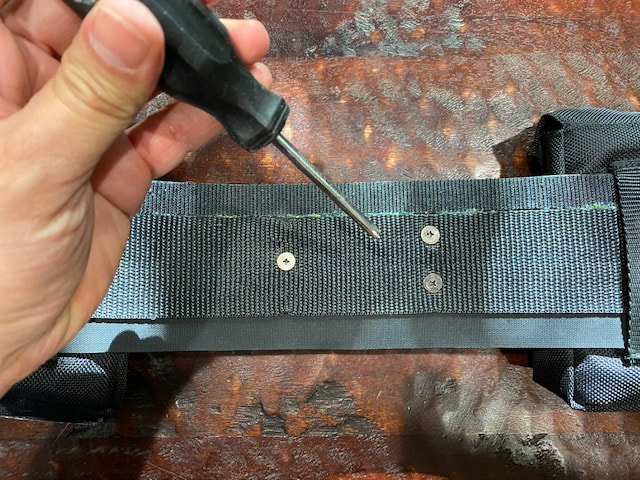
I double back the nylon webbing. glued down with E-6000, drilled two holes and secured with x2 Chicago scews and glued velcro over it.
|

You can see the Chicago screws inserted through nylon and rubber portions. This should prevent belt separation during use and fastening.
|
Right side of webbing glue and secured with Chicago screws to prevent separation w/enough nylon webbing left over to adjust belt.
|

I have about 6" webbing left over for adjustment. Just to the right are x2 Chicago screws holding the opposite hard plastic box in place.
|
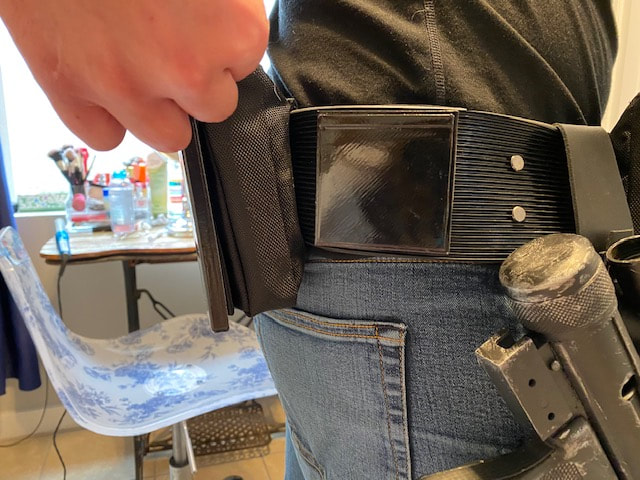
This reference image shows left side pulled over and connect to right buckle. Notice the rubber portion on the right is not glue all the way...
|
The reason why the right rubber portion is not glued is so you can adjust it and tuck behind the right rear ammo pouch. For a crisp look.
|
In this image I have attached the belt and tucked that loose rubber portion of the belt behind the right rear pouch.
|
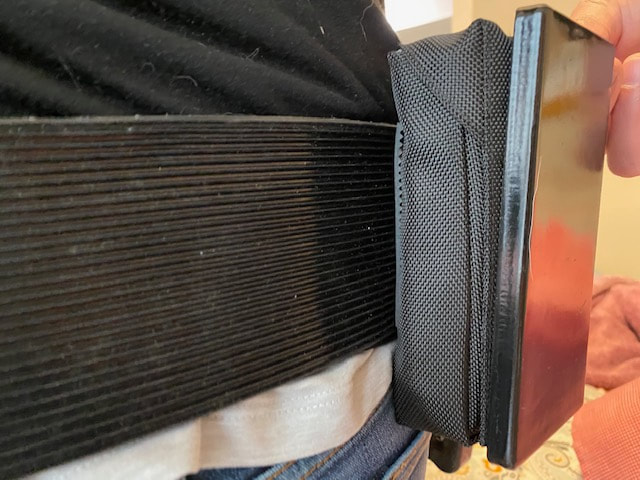
Left side of rear pouch. You can see the overlap hiding behind the pouch nice and neat per Empires rigid standards.
|

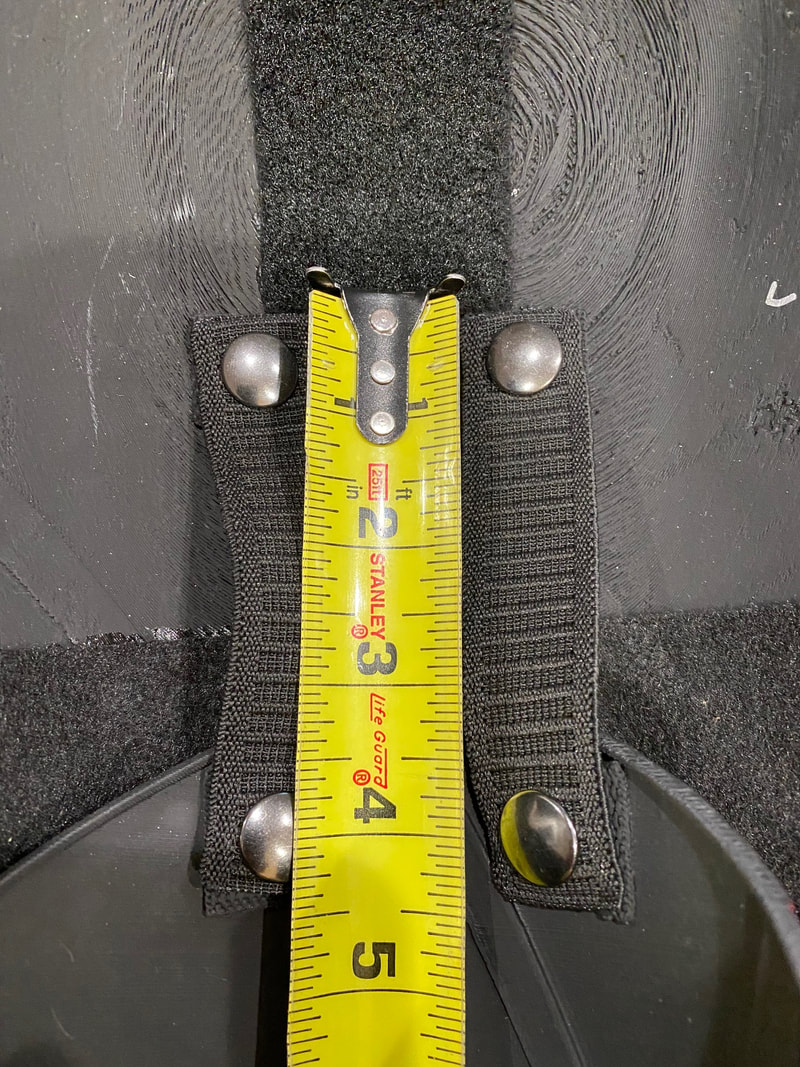
You can see the .5" velcro above and x3 Chicago screws used to mount the buckle in place. I wanted an option to remove it if necessary.
|
Only x3 Chicago screws keep this buckle secure on the belt. The screws are just long enough to meet the width of both nylon and rubber.
|
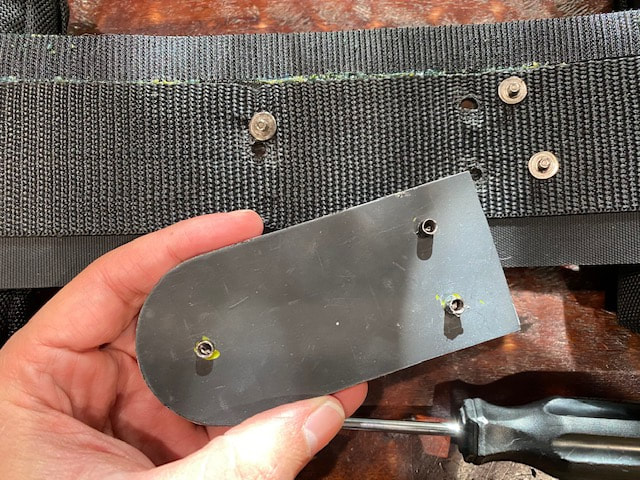
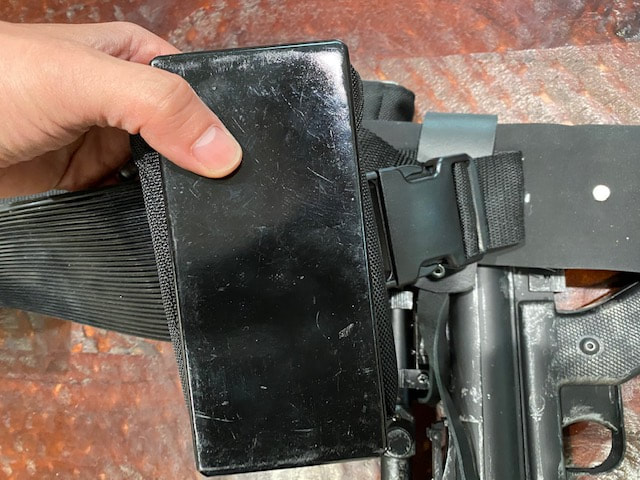
Just gluing the Chicago screws on the buckle didn't seem secure enough, so I cut a piece of acrylic to cover the screws for more strength.
|
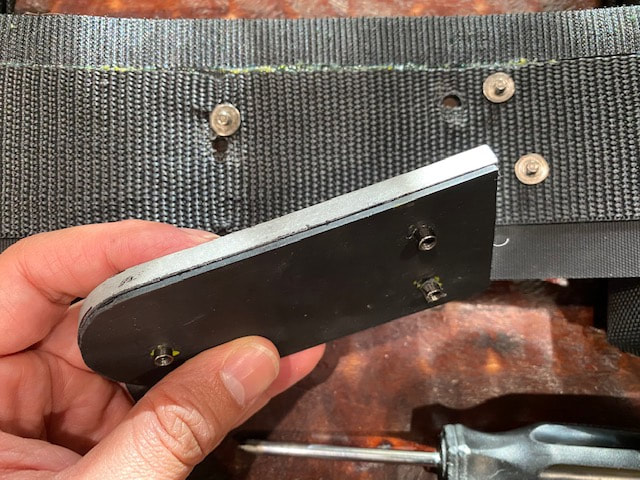
You can see the 1/8" acrylic, but you need to drill a recess on the buckle so the screws sit flush between the acrylic and buckle leaving no gaps.
|
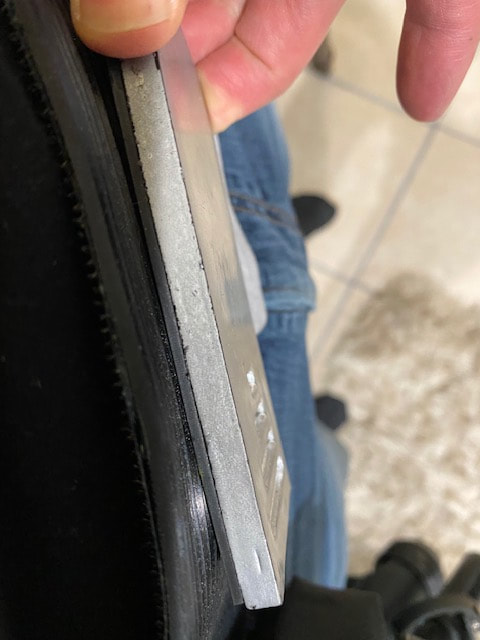
I drilled recess holes into buckle for Chicago screws, glued them in place, cut 1/8" acrylic to buckle size and glued to keep buckle secure.
|
Supplies
Note
|
References
|
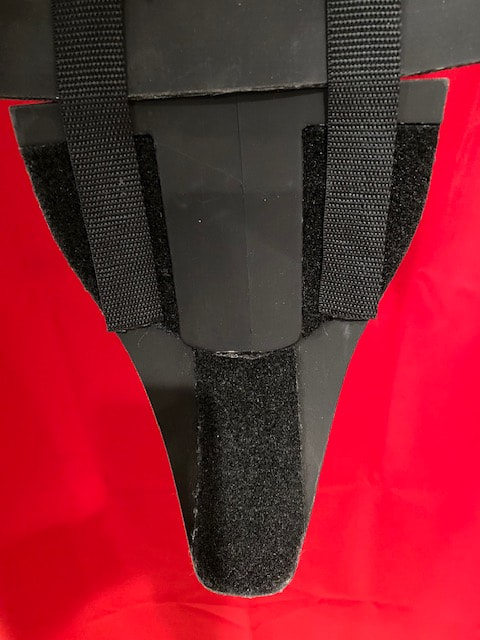
Death Trooper Cod Piece
The top of the cod piece sits flush with bottom of ab plate.
|

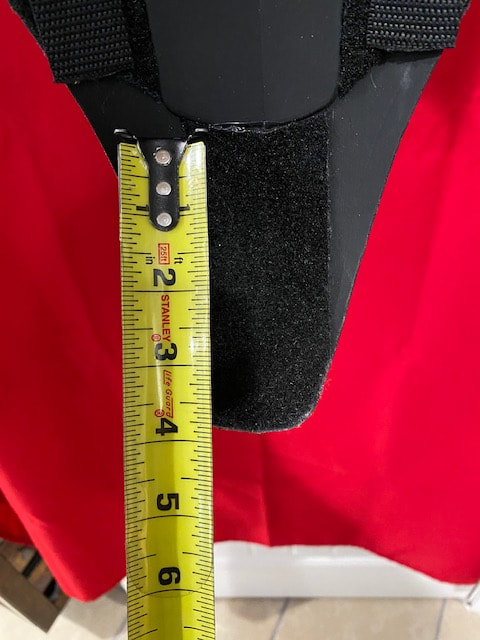
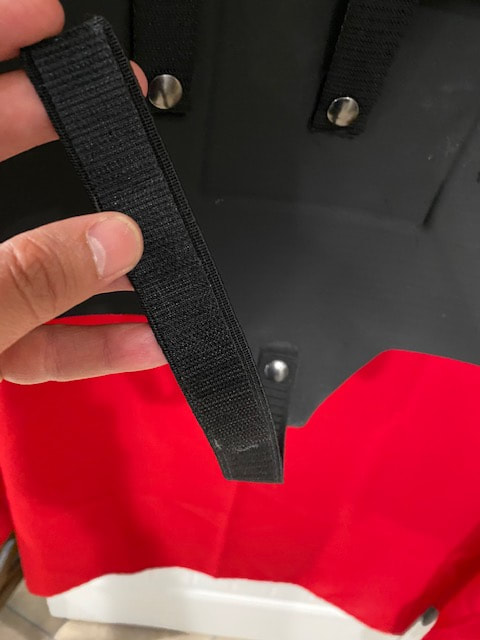
x2 1" nylon straps & snaps w/ velcro secure the cod piece in place.
|
Velcro is glued w/E-6000 on opposite side of nylon straps.
|
The bottom of the cod piece is glued with pile-side Velcro.
|
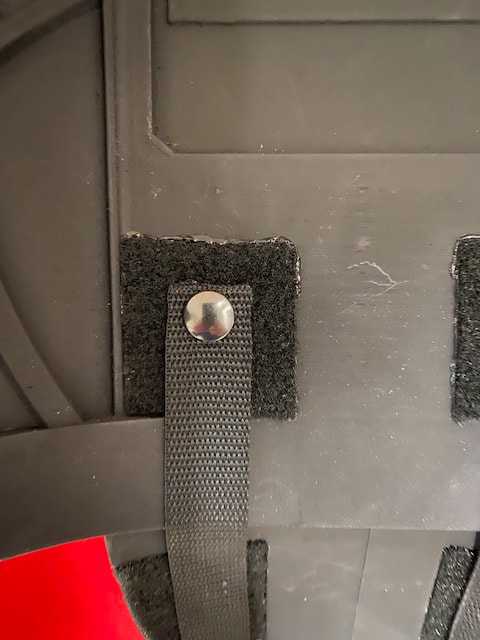
Top straps have 1" velcro & snaps to doubly secure them in place.
|
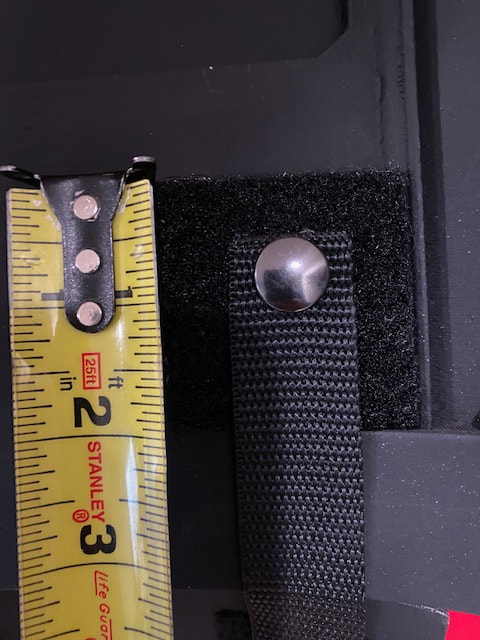
Pile-side velcro square with female end snaps are glued to ab plate.
|
Straps are 6" long and with velcro on the end the cod can be adjusted.
|
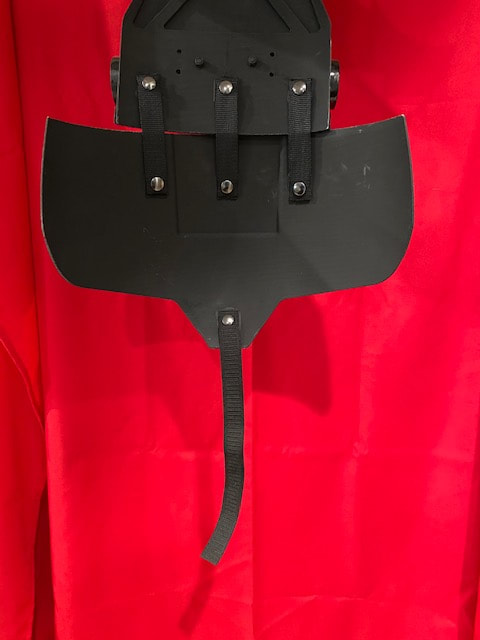
View of the butt plate & elastic strap to keep the cod / butt plate secure.
|
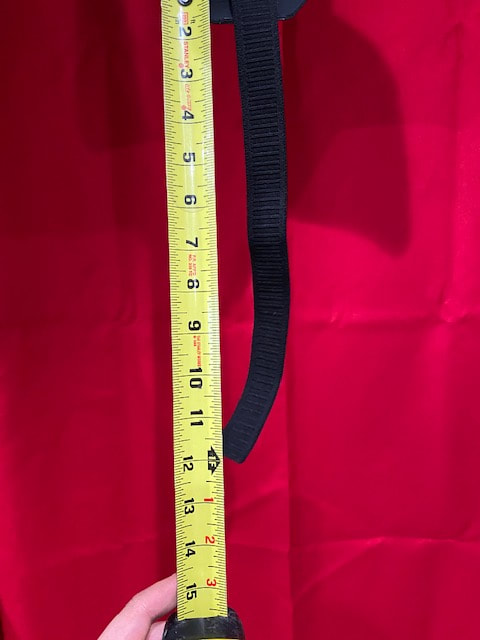
Elastic band is 1" wide and 12-13" long. You may need to trim...
|
The last 7" has 1" hook-side velcro to secure to bottom of cod piece.
|
The last 7" has 1" hook-side velcro glued w/E-6000 on opposite side.
|
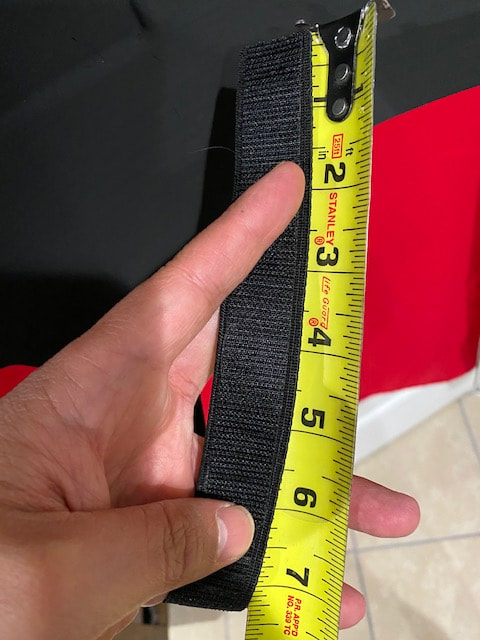
Death Trooper Pauldron (Shoulders) & Rerebrace (Biceps)
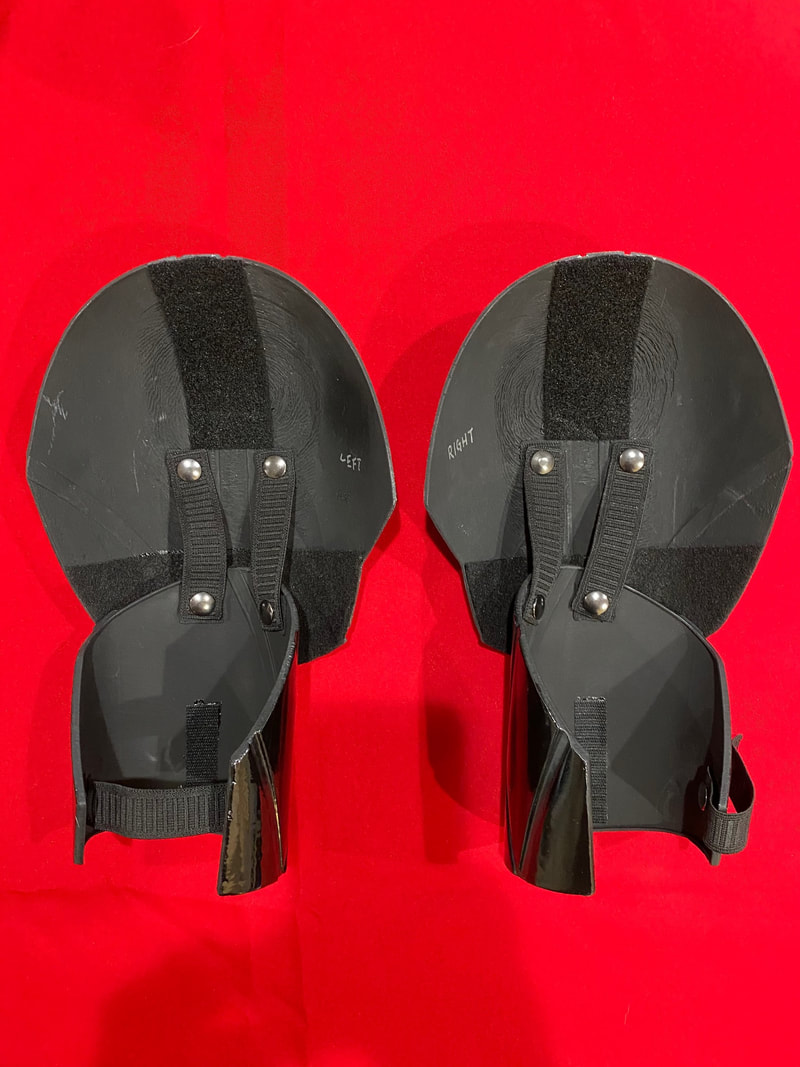
Left and right pauldrons attached with x2 1" elastic bands and snaps.
x2 1" hook sided Velcro is used to also secure Pauldrons to arms.
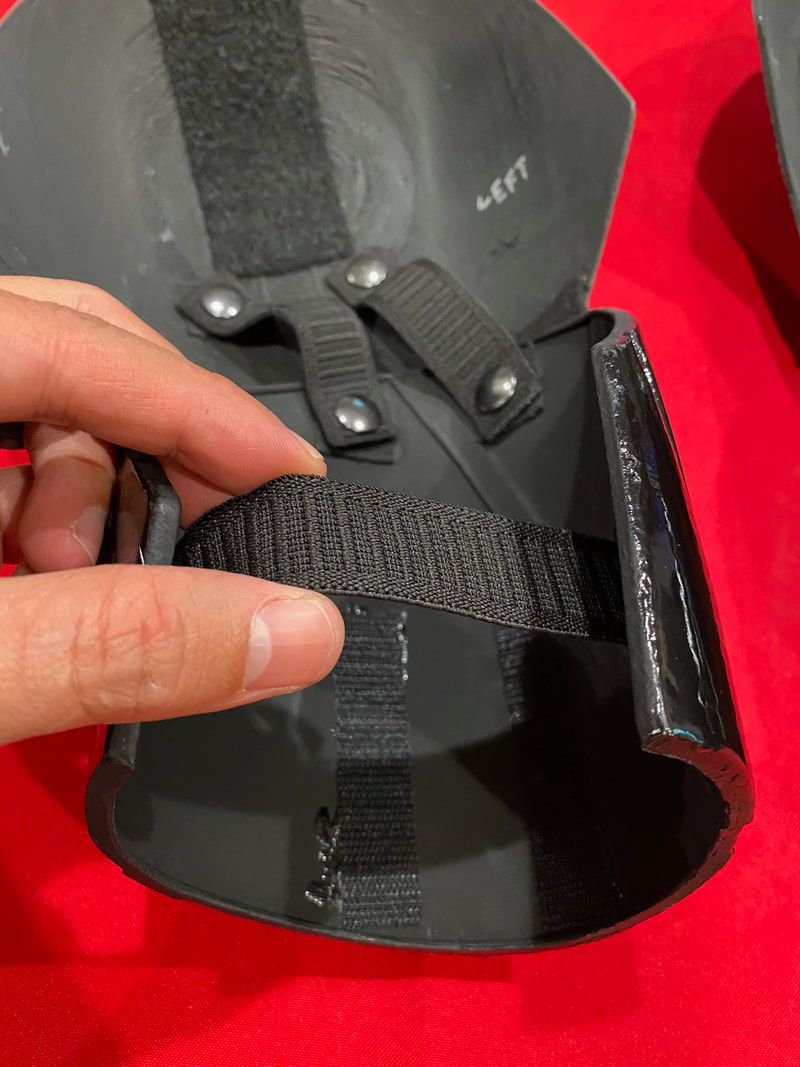
Band snapped in-place, and prevents ridiculous movement.
|
Pile side of Velcro that attaches to hook side that is on the body suit.
To prevent Pauldrons from sliding around an elastic band was made.
I used felt to line bottom of top Pauldrons to prevent rubbing.
|
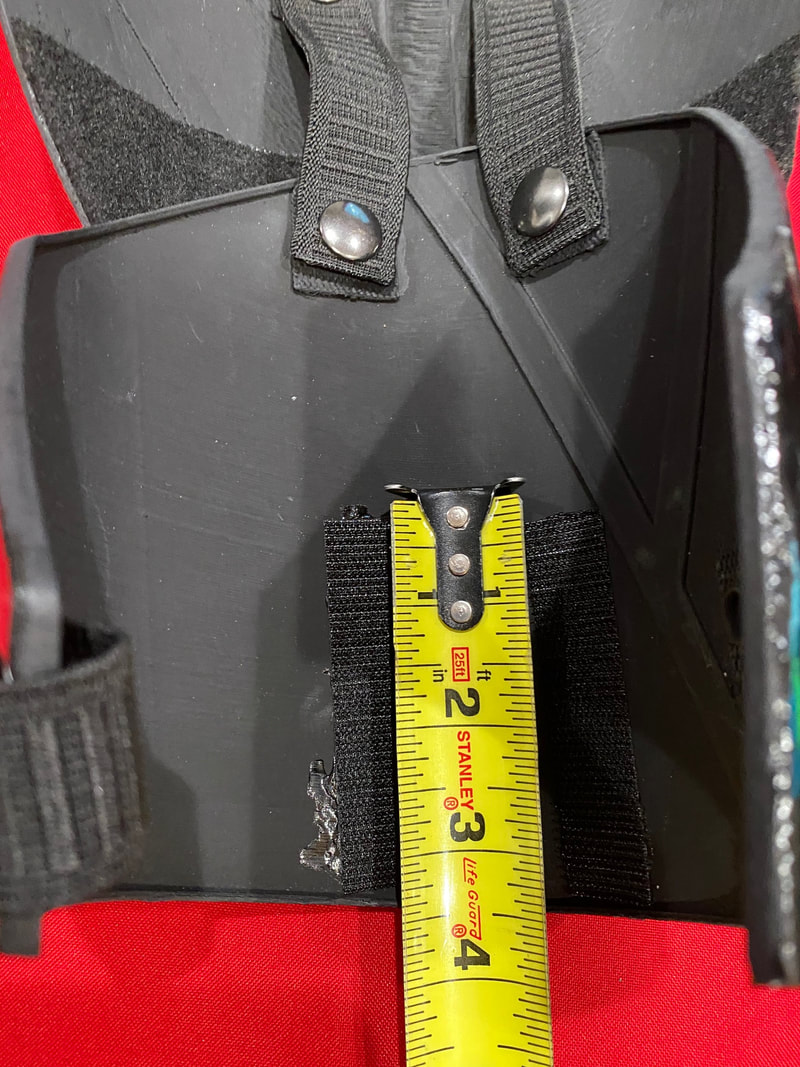
I used 2" Velcro cut to 4.5" so it can be adjusted as needed.
From the previous image the band helps secure Pauldron in-place.
|
Snaps are used to secure x2 1"elastic straps that were cut to 4.5".
I cut 1x1" square nylon webbing and secure snaps in-place with E-6000.
|